Creating a Python-Based FTP Server from Scratch
Read Time:11 Minute, 50 Second
In today’s digital landscape, efficient data transfer and management are paramount, and the File Transfer Protocol (FTP) remains a cornerstone in achieving this goal. Whether you need to upload files to a web server, download data from a remote location, or automate routine file transfers, Python provides a robust set of tools to streamline your server interactions.
Welcome to our comprehensive tutorial, where we will embark on a journey to demystify the intricacies of working with FTP servers using Python. Throughout this guide, we will unravel the fundamentals of it, delve into powerful libraries and modules for operations, and walk you through practical examples that showcase real-world scenarios.
File Transfer Protocol is a robust protocol designed to facilitate the movement of files within a digital network. In essence, it serves as a bridge, enabling the transfer of files between computers, irrespective of their location.
Essential Characteristics:
- Standardized Protocol: FTP follows a specific set of guidelines ensuring compatibility across diverse systems;
- Bidirectional Transfer: It enables both uploads and downloads, making data exchange seamless;
- Secure Variants: Protocols like Secure File Transfer Protocol offer encrypted, secure file transfers.
FTP in the Corporate Landscape:
It isn’t just a relic of the internet’s early days. It’s a tool that businesses, particularly large-scale enterprises, lean on to exchange voluminous files securely.
Why Companies Rely on It:
- Efficient Large File Transfer: Bypasses email attachment limitations;
- Enhanced Security: With the right configurations, FTP can secure sensitive data during transit;
- Cross-Platform Compatibility: Allows file transfers across different operating systems.
File Transfer Protocol for the Tech-Savvy:
If you’re a programmer or a developer, there’s a good chance you’ve had to share outputs – from model predictions to test results. With FTP, these digital assets can be dispatched and accessed across various business segments without hassle.
Tips for Programmers :
- File Naming Conventions: Adopt a clear and consistent naming pattern to make files easily recognizable;
- Folder Structuring: Organize files in a hierarchical manner for easy navigation and retrieval;
- Backup Regularly: Always maintain a local copy of the files before initiating transfers.
Getting Hands-On: Testing with DLP Test Server:
For those eager to experiment with FTP without any commitments, the DLP Test server offers a sandbox environment. This public test server lets users get a feel of the functionalities, but with a safety net – it automatically purges files after a short duration.
Advantages of Using DLP Test Server:
- Cost-Effective: A free platform to test and understand FTP operations;
- Data Safety: With automatic file deletion, there’s no lingering data, ensuring user privacy;
- Ideal for Beginners: A risk-free environment for those new to it to learn the ropes.
Establishing a Connection to an FTP Server with Python
Transferring files and managing content on remote servers is made easy with the File Transfer Protocol (FTP). Python, known for its versatility, has a built-in library called ftplib that enables seamless interaction with FTP servers.
1. Installing Necessary Libraries
Before connecting to an FTP server, it’s vital to ensure all required libraries are in place. For this task, Python’s native library, ftplib, is required. If not already present, simply import it:
import ftplib
2. Gather Essential Credentials
To establish a connection to any FTP server, a set of credentials is required. These typically include:
- Host: The server’s address;
- Username: Authorized username to access the server;
- Password: Password corresponding to the username for authentication.
For the purpose of demonstration, let’s consider a hypothetical test server. The credentials for this server might be listed on a documentation page or provided by the administrator.
3. Storing Credentials in Python
It’s a good practice to define your credentials as constant variables in your script for better readability:
# Defining FTP server credentials
FTP_HOST = "ftp.dlptest.com"
FTP_USER = "dlpuser"
FTP_PASS = "rNrKYTX9g7z3RgJRmxWuGHbeu"
4. Initiating Connection to the FTP Server
With the credentials in place, the next step is to leverage ftplib to establish a connection:
# Initiating a connection to the FTP server
ftp = ftplib.FTP(FTP_HOST, FTP_USER, FTP_PASS)
5. Verifying the Connection
Once the connection is set up, it’s advisable to validate it. A quick method is to request a welcome message from the connected FTP server. Most servers typically return a welcome message, though it’s not a universally followed norm.
# Retrieving and printing the server's welcome message
print(ftp.getwelcome())
For the aforementioned test server, this would ideally return:
'220 Welcome to the DLP Test FTP Server'Remember, not all FTP servers might provide a welcome message. Therefore, the absence of a message isn’t always indicative of a failed connection. In our example, the DLP Test FTP Server is known to give a welcome message upon successful connection.
Extracting a List of Files from an FTP Server Using Python
FTP (File Transfer Protocol) servers are often used to store files and directories that can be accessed and manipulated remotely. Python, with its extensive libraries and modules, offers straightforward ways to interact with FTP servers, making tasks such as listing files in a directory easy and efficient.
Understanding the Current Directory:
Before diving into listing files, it’s beneficial to understand the current directory you are in on the FTP server. This context can be ascertained using the following method:
# Retrieve the current directory path
current_directory = ftp.pwd()
print(current_directory)
Executing this should display the root directory represented as /, indicating the starting point within the FTP server.
Listing Files in the Directory:
Once you’re familiar with your location in the server’s structure, the next step is listing the files. This can be done in a couple of different ways:
Displaying a Detailed Directory Listing:
By invoking this method, the system presents a detailed view of files, complete with permissions, ownership, size, and modification date.
# Display a detailed directory listing
ftp.dir()
On execution, this would show an output similar to:
-rw-r–r– 1 1001 1001 958 Aug 15 17:30 file1.txt
-rw-r–r– 1 1001 1001 958 Aug 15 17:30 file2.txt
-rw-r–r– 1 1001 1001 0 Aug 15 17:31 file3.txt
Fetching a Simple List of File Names:
For those interested in just the file names without the accompanying details, Python provides another method.
# Fetch a list of files in the directory
file_list = ftp.nlst()
print(file_list)
When run, the script will generate a Python list showcasing the files:
['file1.txt', 'file2.txt', 'file3.txt']Creating a New Directory in Your FTP Server
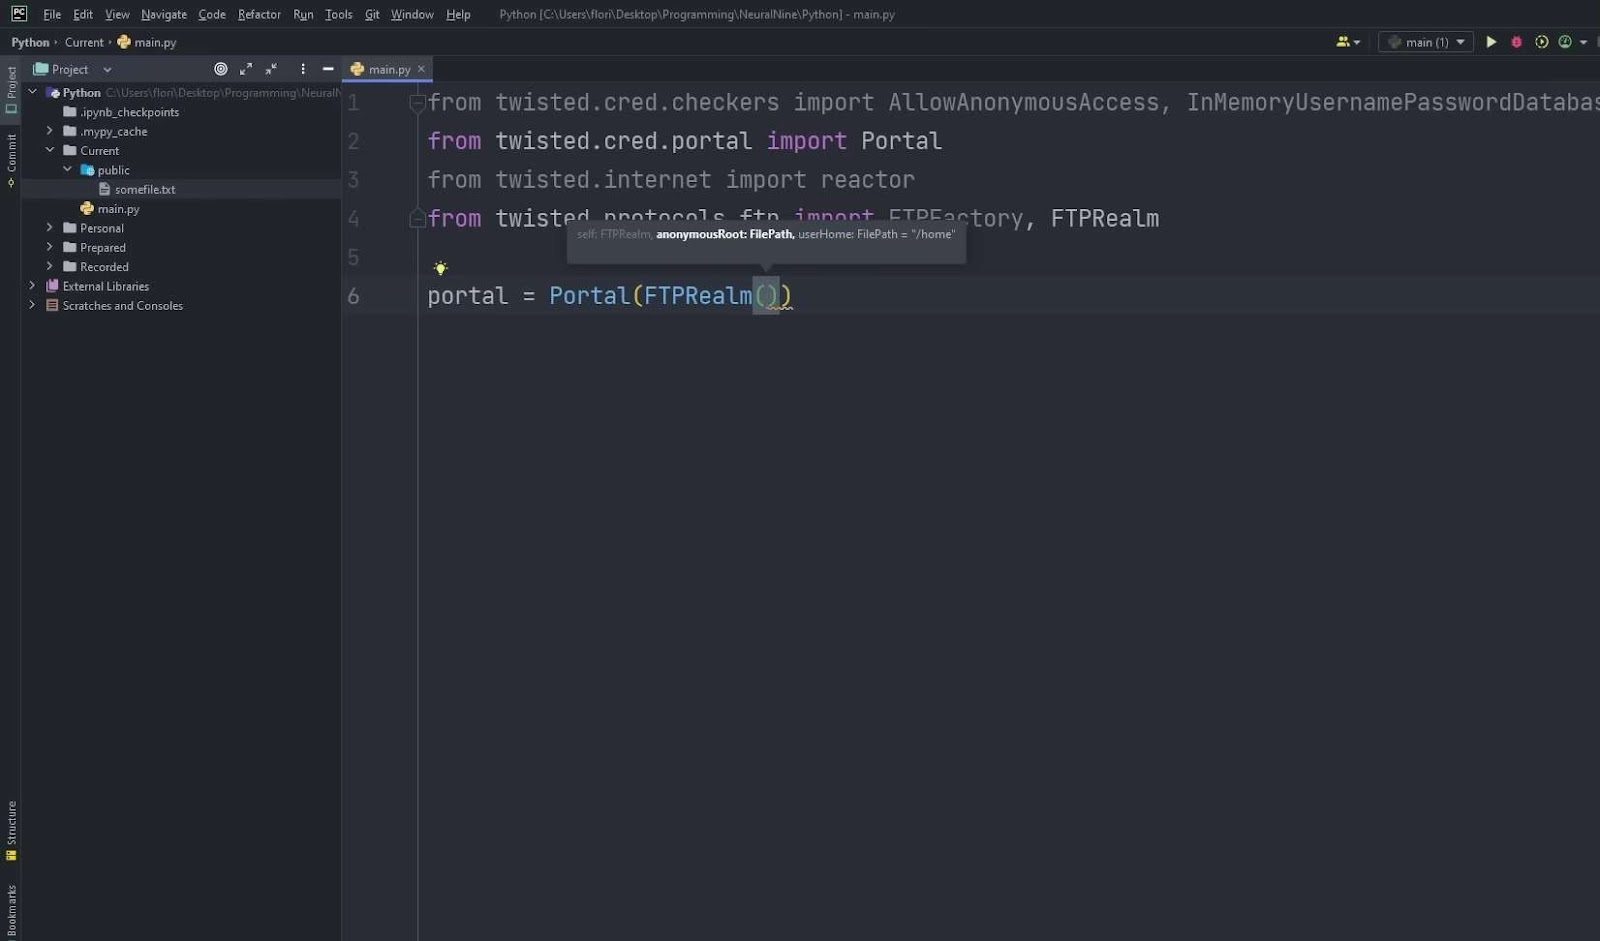
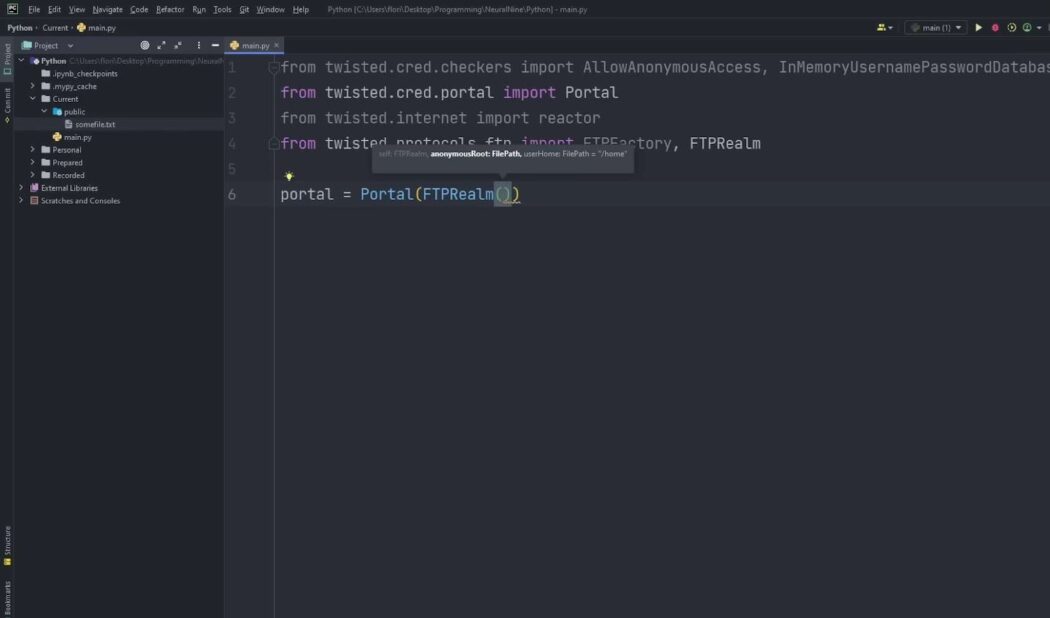
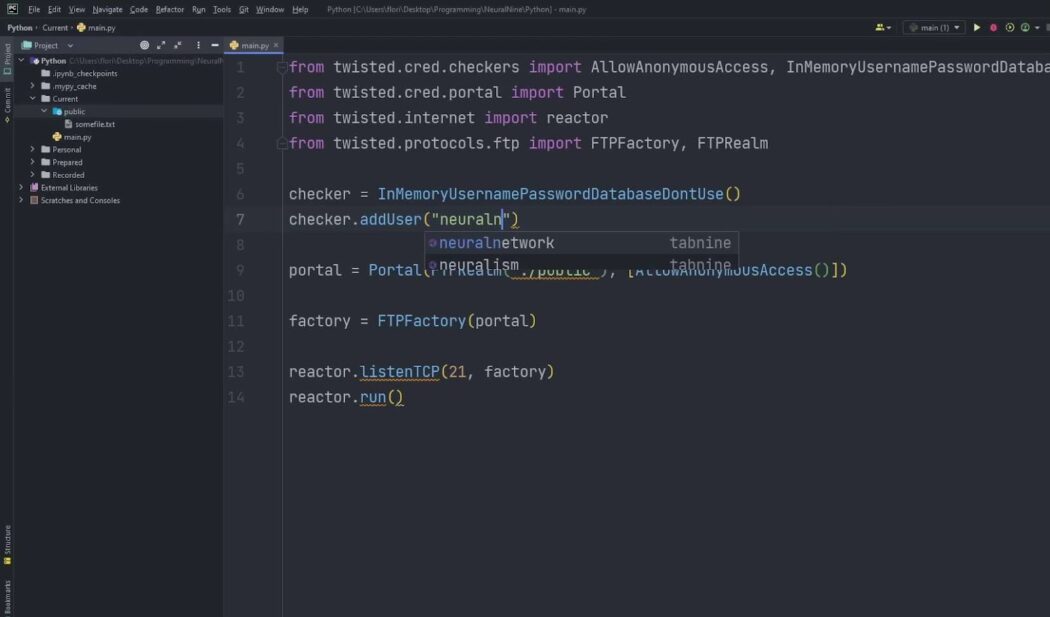
Before diving into the exciting world of uploading files to your server, let’s begin by establishing our own dedicated folder to organize our testing materials. This step will ensure a seamless and structured approach to managing your activities. Since this server serves the purpose of numerous developers testing their code, it’s crucial to maintain order and clarity.
Follow these steps to create a subdirectory called ‘pyshark’:
Initialize the FTP Connection: First, establish a connection to your server in Python. You can use the ftplib library, which provides essential functionalities.
# Import the ftplib library
from ftplib import FTP

# Establish an FTP connection (replace 'ftp.example.com' with your FTP server address)
ftp = FTP('ftp.example.com')

# Log in with your credentials (replace 'username' and 'password' accordingly)
ftp.login(user='username', passwd='password')
Create the New Directory: Once connected, create a new folder using the mkd() method, and name it ‘pyshark.’
# Create a new folder in the directory
ftp.mkd('pyshark')
Verification:
To confirm the successful creation of the ‘pyshark’ folder, you have two options:
Use an client like FileZilla to connect to your server and check for the ‘pyshark’ directory.
Alternatively, print a list of file names in the directory to ensure ‘pyshark’ is listed.
# Print a list of files in the directory
print(ftp.nlst())
Setting the New Directory as the Current Directory on the Server
Now that we have ‘pyshark’ set up, let’s make it the current working directory on the server for our operations.
Follow these steps:
Change the Current Directory: Use the cwd() method to set ‘pyshark’ as the current directory.
# Set the new folder as the current directory
ftp.cwd('pyshark')
Validation: Confirm the directory change by retrieving the name of the current directory and printing it.
# Get current directory path
print(ftp.pwd())
You should see the output ‘/pyshark,’ indicating that ‘pyshark’ is now your current working directory on the server.
Preparing a Sample File for Upload
Create the Sample File: Open a text editor or Python script and create a new file called ‘file1.txt.’ Add the text “This is a sample file” to it and save it.
Uploading Files to Your Server
Now that we have the ‘pyshark’ directory ready and a sample file prepared, let’s explore how to upload this file to the FTP server.
Follow these steps to upload the sample file:
# Upload file to FTP server
with open('file1.txt', 'rb') as f:
    ftp.storbinary('STOR ' + 'uploaded_file.txt', f)
Verification: To confirm the successful upload, generate a list of files in the current directory using nlst().
# Produce a list of files in the directory
print(ftp.nlst())
You should observe the output [‘uploaded_file.txt’], indicating that your file ‘file1.txt’ has been successfully uploaded to the server under the name ‘uploaded_file.txt.’
Retrieving Files from an FTP Server
Understanding how to efficiently fetch files from a File Transfer Protocol server is crucial when dealing with remote file operations. These servers have been a long-standing method to store, retrieve, and manage files over a network. This section delves deep into the process of downloading a specific file from such a server.
For the sake of context, consider a hypothetical scenario where there’s an existing directory named “pyshark”. This will be the directory under focus for this tutorial.
The Core Method: .retrbinary()
The FTP class in Python comes with a method named .retrbinary(). As the name suggests, this method facilitates the retrieval of a file in binary format from the server. The command RETR is the underlying command utilized by this method. Using it ensures that even binary files like images or executables are correctly downloaded without any corruption.
Let’s assume a scenario wherein a file was previously uploaded to this server. The goal now is to download this very file back to the local system.
Step-by-Step Implementation:
Preparation of Destination File:
Before initiating the download process, there should be a file on the local system to store the incoming data. To prepare for this, create a binary file in ‘write’ mode. In this example, this file is named “downloaded_file.txt”.
Downloading the File:
Use the .retrbinary() method to initiate the download process. The target file on the server is “uploaded_file.txt”.
# Retrieving a file from the FTP server
with open('downloaded_file.txt', 'wb') as f:
    ftp.retrbinary('RETR ' + 'uploaded_file.txt', f.write)
Post-Download Check:
Once the code is executed, it’s essential to verify the download. Check the “pyshark” directory, and the “downloaded_file.txt” should be present. This file will contain the data fetched from the FTP server.
Renaming Files: A Comprehensive Guide
Current Working Directory: Before we proceed, ensure that you are working in the correct directory on your FTP server. In this example, we’ll be working within the “pyshark” folder.
Using the .rename() Method: Renaming a file is remarkably straightforward. You can accomplish this task using the .rename() method of the class. This method takes two parameters: the original file name and the new file name.
Here’s an example of how to rename “uploaded_file.txt” to “renamed_file.txt”:
# Rename file in FTP server
ftp.rename('uploaded_file.txt', 'renamed_file.txt')
Verifying the Rename: After renaming the file, it’s always a good practice to confirm that the operation was successful. You can do this by listing the files in the directory. The .nlst() method helps us achieve this.
# Produce a list of files in the directory
print(ftp.nlst())
If the renaming was successful, you should see:
renamed_file.txt in the listTips and Insights:
- Always double-check the original and new file names to avoid errors during the renaming process;
- Renaming files can be particularly useful for maintaining an organized and structured file system;
- Make sure you have the necessary permissions to rename files, as this might be restricted in certain environments.
Deleting Files: Step by Step
Current Working Directory: As before, ensure that you are in the “pyshark” folder.
Using the .delete() Method: To delete a file from the server, you can employ the .delete() method of the class. This method requires just one parameter – the file name you want to remove.
Here’s an example of how to delete the file “uploaded_file.txt”:
# Delete file from FTP server
ftp.delete('uploaded_file.txt')
Verifying the Deletion: After deleting the file, it’s essential to confirm that it was removed successfully. You can verify this by listing the files in the directory using the .nlst() method.
# Produce a list of files in the directory
print(ftp.nlst())
If the deletion was successful, you should see an empty list.
Tips and Recommendations:
- Always be cautious when deleting files, as this action is irreversible;
- Regularly review and clean up your server to free up storage space and maintain an organized file structure;
- It’s a good practice to perform a final check to ensure you’re deleting the correct file before executing the deletion command.
By following these steps and best practices, you’ll be adept at renaming and deleting files, ensuring smooth file management for your projects and data.
Conclusion
In this article, we delved into the intricacies of harnessing the power of Python for interacting with an FTP server. Our journey encompassed a spectrum of actions, from the seamless transfer of files through uploading and downloading, to the precise eradication of files residing within the directory. We also navigated through a treasure trove of valuable functions offered by the ftplib library.
Happy
0 %
Sad
0 %
Excited
0 %
Sleepy
0 %
Angry
0 %
Surprise
0 %

Average Rating